Create Your First Agentforce 360 Agent — A Step-by-Step Guide
AI agents in Salesforce are powerful — but to make them work, you need a structured approach. This guide gives you 10 clear steps (with bullet-point actions) to create your very first Agentforce 360 Service Agent.
What you’ll build (example)
A Service Agent that:
Answers FAQs
Fetches account/order/case details from CRM
Takes actions (e.g., Create Case, Send Email, Book Appointment)
Escalates when confidence is low
Prerequisites (5-minute checklist)
Enable Agentforce 360 and the Default Agent in Setup
Assign the correct permission sets (e.g., Agentforce 360 Service Agent Builder)
Use a Sandbox environment with masked/seeded test data
Confirm Einstein Trust Layer is active for data security
Step-by-Step: Build Your First Agent
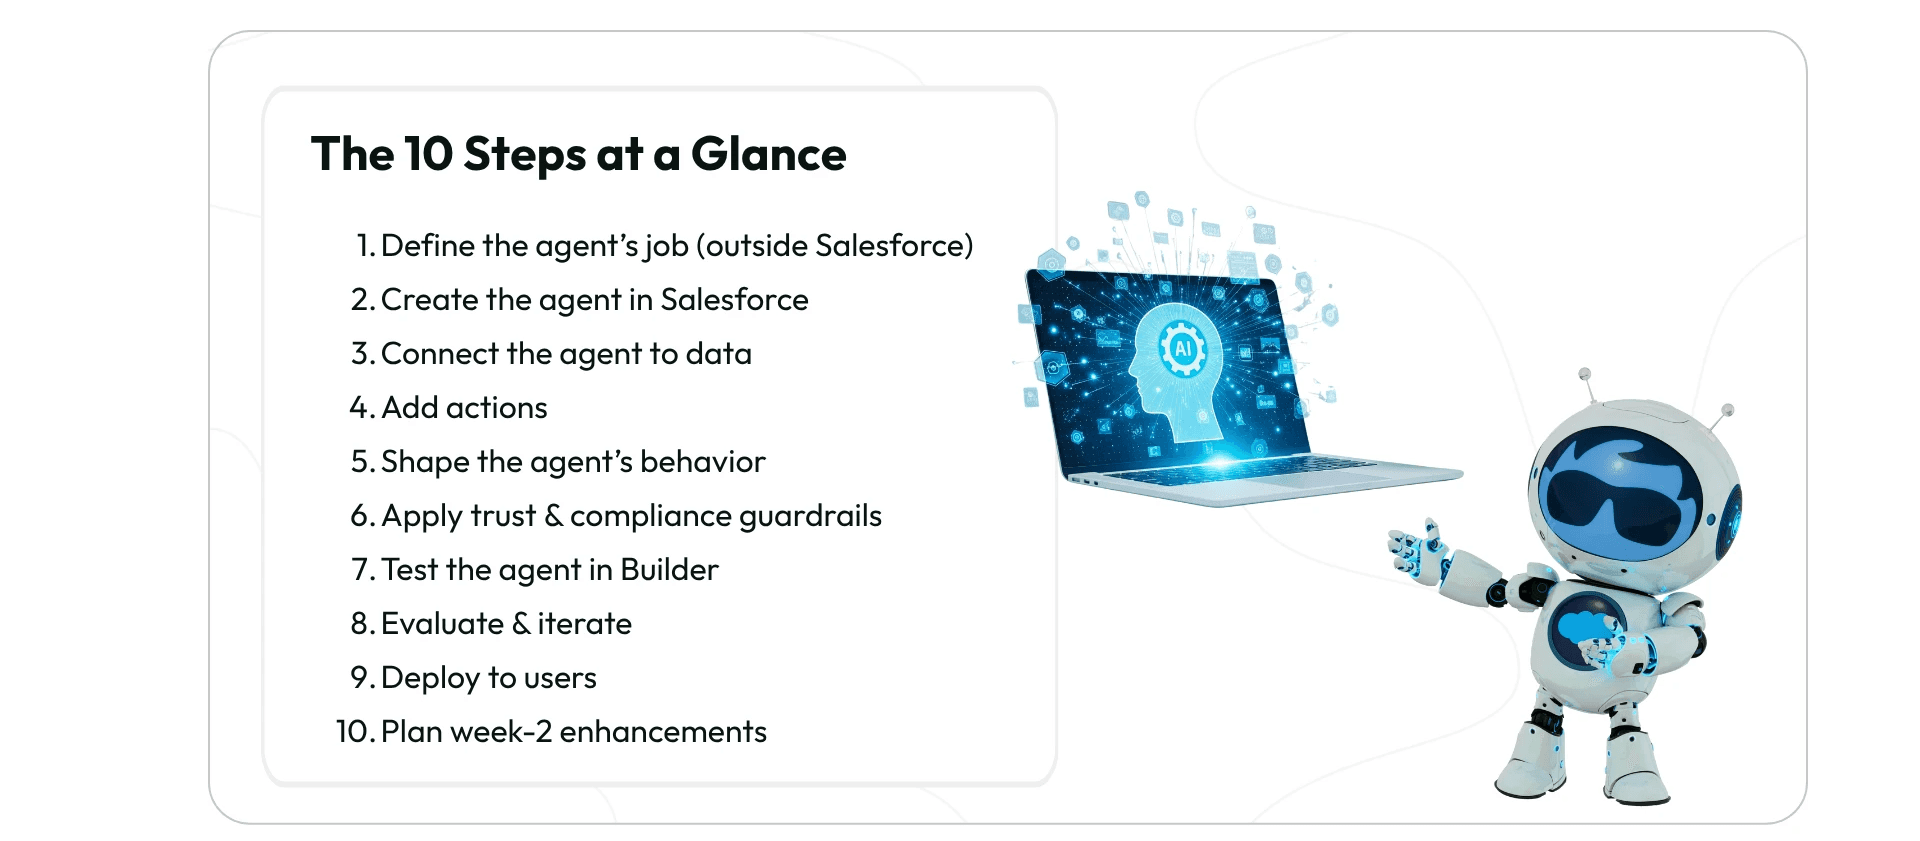
1) Define the agent’s job (outside Salesforce)
Do this in a planning doc (Google Doc, Confluence, Jira epic, or BRD/AI Playbook)
Run a workshop with business + IT stakeholders
Capture:
Purpose: What problems it solves (e.g., answer FAQs, fetch orders)
Guardrails: What it must not do (e.g., never share PII)
KPIs: How success is measured (containment %, CSAT, AHT, escalation rate)
Output: A one-pager “Agent Job Description” to guide the build
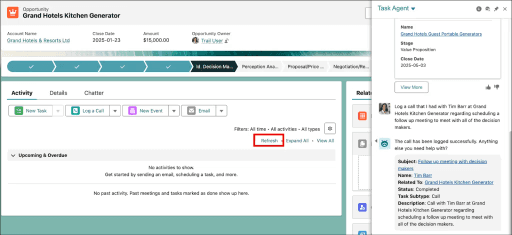
2) Create the agent in Salesforce (2 minutes)
Go to Setup → Agentforce 360 Agents
Click New Agent
Select Service Agent template
Enter Name + Description
Click Create
3) Connect the agent to data (10–20 minutes)
Identify the CRM objects it needs (Accounts, Contacts, Cases, Orders)
Give field-level security only for required fields
(Optional) Link Data360 for unified customer profiles
Ensure least privilege access — avoid overexposing sensitive data
4) Add actions (15–30 minutes)
Choose 3–5 safe starter actions (Flows/APIs), e.g.:
Create Case
Update Case
Send Email
Book Appointment
Log Call
Use Flow for low-code, auditable automation
Add approval steps for sensitive actions
5) Shape the agent’s behavior (10–15 minutes)
Write a purpose/system prompt (tone, role, limits, escalation rules)
Define response style (e.g., concise bullets + next action)
Narrow scope to one domain for first release
Example starter purpose prompt:
“You are the Service Agent for [Brand]. You answer FAQs, retrieve order/case details, and can only perform these actions: [list]. If confidence < 0.6, ask clarifying questions. Never reveal PII.”
6) Apply trust & compliance guardrails (5–10 minutes)
Confirm Einstein Trust Layer is enabled
Verify field-level security & data sharing rules
Turn on logging of prompts/outputs (privacy-safe)
Review data compliance policies before launch
7) Test the agent in Builder (15–30 minutes)
Use Preview/Test mode in Agent Builder
Run scenarios:
Happy path: “Where is my order 12345?”
Edge case: “Delete my data”
Policy test: “Give me John’s phone number” (should refuse)
Check that guardrails hold and outputs match the purpose
8) Evaluate & iterate (ongoing)
Track key metrics:
Containment rate
Avg. handle time
CSAT
Escalation rate
Refine prompts (add examples, tighten scope)
Add one new action at a time
Keep a version log of changes
9) Deploy to users (10 minutes)
Start with a pilot group (small support team)
Deploy in Salesforce Console first
Share a 1-pager training guide
Run a 10-minute huddle to explain when to use/escalate
10) Plan week-2 enhancements
Add a new safe action (e.g., Update Case)
Extend training set (20 resolved cases as examples)
Connect one external API (through Flow with guardrails)
Monitor KPIs to validate improvements
Wrap-up
By breaking down the process into these 10 bullet-pointed steps, you avoid scope creep and reduce risk. The magic lies in Step 1 — defining the agent’s job before touching Salesforce. Once you build, keep iterating, measuring, and expanding safely.

Navin Aswani

Schedule a Free Salesforce Org Audit
Let’s review your tech stack, spot gaps, and show you how to scale better - starting now.
